 |
| Second of the mini-tutes series! |
1) They are slouchy AND feminine (i.e. effortless);
2) They give you a lengthened look (instant skinny anyone?);
3) They're swishy!! (Yes! Great for practising your model walk!)
This maxi skirt is awesome because-
1) It's super-easy to make (all straight lines);
2) It's layered with chiffon (wearable for casual and dressy occasions);
3) It can be worn as a dress! (Make one, get two!!)
You'll need a cloth for the underlayer, chiffon for the top layer and elastic.
Ready? Here we go!
STEP 1: Grab some plain cloth and wrap it around yourself. I measured it against my hips, but you can measure it against your waist if you want your skirt to hang from there :)
STEP 2: Mark the spot with a pin.
Step 3: Use a second pin to mark a spot on the cloth about 13cm from the first pin. This will give you room to get into your skirt and allow for the rouched waist.
In this picture the pin on the left is the first pin.
STEP 4: Lay out your chiffon on top your cloth and cut so that both are the same size.
In this picture the pins mark the hip/top line of the skirt.
STEP 5: Fold in half as shown, making sure the chiffon is folded over too.
Pin and sew down the length of the skirt, making a tube.
Important: Stop sewing 30cm before the bottom of the skirt. This split in the dress is needed 'cos you'll need room to walk :)
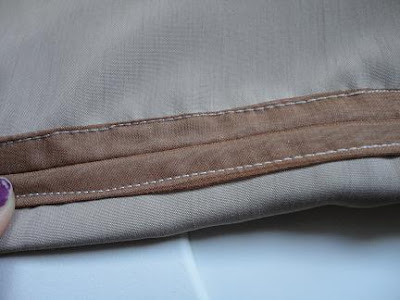
STEP 6: Iron open your seam.
Fold over the raw edges, and pin down the seams. Do this for the split as well.
STEP 7: Stitch!
By the way, this is called a French seam- not only does it neaten the raw edges but the extra stitch lines share in all the pulling and tugging of the skirt with wear.
I know seams are a hassle BUT honestly, take the extra 20 minutes to do it! Your skirt will last a LOT longer for it.
STEP 8: Go back to the ironing board!
Iron the hip line down about 1cm.
STEP 9: Fold the hip line over again, this time about 6cm down. Iron.
STEP 10: Pin and stitch!
Important: Leave about 4 cm unstitched, we'll need this opening to put in the elastic band.
STEP 11: Stretch an elastic band around your hip comfortably. Cut it :)
The elastic band should be a shorter length than the hip circumference of your skirt.
STEP 12: Grab two large safety pins.
Pin one on the end of the elastic. Pin the other onto the opening of the skirt.
Thread the elastic through the opening, all the way around the hip casing.
STEP 13: Pull the end threaded out the other side of the opening.
Use your hands to feel the elastic through the skirt- make sure it hasn't twisted!
STEP 14: Stitch the ends of the elastic band together. Go back and forth on your machine a few times.
Hem your skirt! I hemmed my chiffon layer and cloth layers separately.


Like it? Why not click on the Facebook 'Like' button and share this tute with your friends? (Click on the heading first to find the Facebook button, yay!)


definitely gonna try then when i'm on holidays. i love your blog :)
ReplyDeletei should get YOU to model rfam&co. stuff joyce you're a hottie! ;) miss you catch up soooooon
ReplyDeleteAw you two! Thanks... Inez I definitely want to see you in a Rfam&Co lookbook regardless! And Navera- I wanna see you modelling what you've made!
ReplyDeleteWhat's up, I want to subscribe for this weblog to get most recent updates, thus where can i do it please help.
ReplyDeleteVisit my web site : Recommended Reading